The Foundation of Flawless: Why DIY Brows Are Your Beauty Secret for 2026
In a world that increasingly values self-sufficiency and mindful consumption, taking charge of your beauty routine at home has never been more relevant. Your eyebrows, often called the “frames of the face,” play a pivotal role in expressing your personality and balancing your facial features. While the allure of a professional brow artist is undeniable, the empowerment and practical benefits of mastering your own brow routine are substantial, especially as we look towards 2026 and beyond.
Cost-Effectiveness & Convenience: Let’s be honest, regular salon visits for brow shaping and maintenance can add up significantly over time. Learning to groom your brows yourself not only saves you a considerable amount of money but also offers unparalleled convenience. No more scheduling appointments, battling traffic, or rearranging your day. You can touch up, shape, and perfect your brows whenever and wherever suits you best, fitting seamlessly into even the busiest schedules. This freedom aligns perfectly with the modern woman’s desire for efficiency and control over her time and resources.
Personalized Perfection: Who knows your face and your preferences better than you do? When you take the reins of your brow grooming, you have complete control over the shape, thickness, and arch that best complements your unique facial structure and personal style. This hands-on approach allows for a level of customization that can be challenging to achieve elsewhere. You can experiment, adjust, and refine until you discover the brow shape that feels most authentically ‘you’. This personalized approach is a hallmark of truly sophisticated style, echoing the philosophy behind building a versatile and personal How To Build Capsule Wardrobe 2026.
Empowerment & Skill Development: There’s a profound sense of accomplishment that comes with mastering a new skill, especially one that directly enhances your self-presentation. Learning to do your brows at home isn’t just about plucking a few hairs; it’s about understanding facial symmetry, recognizing natural hair growth patterns, and developing a keen eye for detail. This skill builds confidence, not just in your appearance but also in your ability to learn and execute new techniques. It’s a small but significant act of self-care and self-mastery that contributes to an overall feeling of being put-together and capable.
Consistency & Maintenance: Regular maintenance is key to keeping your brows looking their best. When you’re in charge, it’s easier to maintain that consistent, polished look between major shaping sessions. Little touch-ups become part of your regular beauty routine, preventing your brows from ever looking unruly or neglected. This consistent upkeep ensures that your brows always contribute positively to your overall appearance, much like selecting timeless pieces for a French Girl Style Guide Wardrobe Essentials ensures you always look chic and effortless.
By investing a little time and effort into learning the ropes of at-home brow grooming, you’re not just saving money; you’re gaining control, confidence, and a truly personalized approach to beauty that will serve you well for years to come. It’s an essential step towards crafting a cohesive and polished image, starting right above your eyes.
Understanding Your Unique Arch: The Science of Brow Shaping
Before you even think about picking up a pair of tweezers, the most crucial step in achieving perfect brows at home is understanding the natural shape of your brows and how they relate to your unique facial structure. This isn’t about forcing a trend-driven shape onto your face but rather enhancing what nature has already given you. Think of it as finding the perfect tailored fit – it complements your existing frame rather than trying to create a new one. This fundamental understanding is the cornerstone of a truly flattering brow, ensuring your efforts result in harmony rather than harshness.
The Golden Ratio & Your Face Shape: While there are general guidelines, every face is different. Your face shape (oval, round, square, heart, long, diamond) plays a significant role in determining the most flattering brow arch and thickness. For instance:
- Oval Faces: Often considered the ‘ideal’ face shape, oval faces can typically pull off most brow shapes. A soft, angled arch is usually very flattering, following the natural curve of the brow bone.
- Round Faces: To add definition and create the illusion of length, a higher arch with a more defined peak can be beneficial. Avoid rounded brows, which can make a round face appear even rounder.
- Square Faces: Soften angular features with a gently curved or slightly rounded arch. A medium-thick brow can also help balance a strong jawline.
- Heart-Shaped Faces: A soft arch with a gentle curve works well to balance a wider forehead and a narrower chin. Avoid overly sharp or dramatic arches.
- Long Faces: To make a long face appear shorter and wider, opt for straighter, flatter brows with a minimal arch. Extending the tails slightly can also help broaden the face horizontally.
- Diamond Faces: A soft, rounded brow can help soften the widest part of a diamond face (the temples) and balance a narrower chin.
The Three Golden Points of Brow Mapping: This technique is indispensable for finding your ideal brow shape, regardless of your face shape. It helps you identify where your brow should start, arch, and end, creating balance and symmetry. You’ll need a thin makeup brush or a brow pencil for this.
- The Start (Inner Brow): Hold the brush vertically against the side of your nose, aligning it with the inner corner of your eye. Where the brush intersects your brow bone is where your brow should ideally begin. Pluck any stray hairs between this point and the center of your nose.
- The Arch (Highest Point): Look straight ahead. Position the brush diagonally from the outside of your nose, through the center of your iris (the colored part of your eye). Where the brush hits your brow bone is your natural arch’s peak. This is where your brow should be at its highest point.
- The End (Tail): Place the brush diagonally from the outside of your nose, aligning it with the outer corner of your eye. Where the brush meets your brow bone is where your brow should end. Any hairs beyond this point can be removed, and if your brow stops short, you can fill it in.
Natural Growth & Hair Direction: Always pay attention to your natural brow growth. Brows grow in a specific direction, and working with this pattern, rather than against it, will yield the most natural-looking results. When tweezing, always pull hair in the direction of growth to minimize pain and prevent breakage or ingrown hairs. Observe the thickness and density of your brows. Are they naturally full or sparse? This will guide your filling techniques later.
Symmetry is a Myth, Balance is Key: Remember the adage: “Eyebrows are sisters, not twins.” Striving for absolute identical symmetry can lead to over-plucking and frustration. Instead, aim for balance. Your goal is to make them look like harmonious siblings that complement each other and your face as a whole. Slight variations are natural and add to your unique charm.
By taking the time to understand these principles, you’re laying a solid foundation for your at-home brow journey. This initial assessment ensures that every subsequent step you take is purposeful and contributes to a beautifully framed face that enhances your inherent beauty.
Your At-Home Brow Arsenal: Essential Tools & Products
1. High-Quality Tweezers: This is arguably your most important tool. Don’t skimp here. A good pair of tweezers should have sharp, perfectly aligned tips that can grip even the finest hairs without breaking them.
- Slant-Tip Tweezers: The most popular and versatile choice, ideal for general shaping and grabbing multiple hairs.
- Pointed-Tip Tweezers: Excellent for precision work, removing stubborn ingrown hairs, or individual stray hairs.
2. Small, Sharp Brow Scissors: Specifically designed for brows, these tiny scissors allow you to trim long hairs that can make your brows look unruly. Look for ones with a slightly upward curve for easier maneuvering.
3. Spoolie Brush: This looks like a clean mascara wand and is essential for brushing hairs into place before trimming, tweezing, and applying product. It helps you see the natural flow of your brows and identify areas that need attention.
4. Magnifying Mirror: While a regular mirror is good for checking overall symmetry, a magnifying mirror (e.g., 5x or 10x) is crucial for spotting those tiny, fine hairs you might otherwise miss. Use it sparingly to avoid over-plucking; step back often to check your work in a regular mirror.
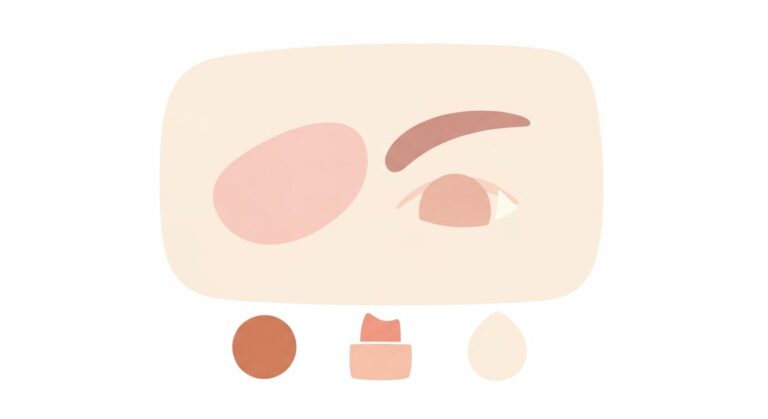
5. Brow Pencil: Ideal for filling in sparse areas, defining the shape, and adding subtle color. Look for a pencil with a fine tip for hair-like strokes.
- Choosing Your Shade: Opt for a shade that is one to two shades lighter than your hair color if you have dark hair, or one shade darker if you have light hair. This creates a natural, soft look.
6. Brow Powder: Offers a softer, more diffused look than a pencil, perfect for filling in larger sparse areas or creating a fuller appearance. Often comes in a duo compact with two shades for custom blending.
7. Brow Pomade: A creamy, highly pigmented product that provides strong definition and hold. Best for those who desire a very sculpted, bold brow or need to fill in significant gaps. Requires a separate angled brush for application.
8. Clear or Tinted Brow Gel: Essential for setting your brows in place, much like hairspray for your hair. A clear gel keeps hairs neat and tidy, while a tinted gel adds a touch of color and volume, especially useful for finer brows.
9. Angled Brow Brush: If using brow powder or pomade, a stiff, angled brush with fine bristles is a must for precise application and creating hair-like strokes.
10. Brow Conditioner/Serum (Optional but Recommended): If you have sparse brows or are recovering from over-plucking, a brow growth serum can encourage healthier, fuller growth over time. Consistency is key with these products.
11. Gentle Cleanser & Moisturizer: Before and after your brow routine, ensure your skin is clean and prepped. Using a gentle cleanser prevents irritation, and a lightweight moisturizer keeps the skin supple. Just as you consider the Body Lotion Vs Body Butter Differences for various skin needs, choose a moisturizer suitable for your face, ensuring it’s not too heavy around the brow area before applying makeup.
By assembling this comprehensive brow arsenal, you’re not just buying products; you’re investing in the tools that will empower you to consistently achieve polished, perfectly groomed brows. Quality tools make the process easier, more effective, and the results more professional.
The Step-by-Step Guide to Achieving Your Best Brows at Home

Now that you’re armed with knowledge about your face shape and the essential tools, it’s time to put theory into practice. This detailed, step-by-step guide will walk you through the entire process of shaping, grooming, and perfecting your brows at home. Take your time, be patient, and remember that practice makes perfect. Precision and a light hand are your best friends here.
Step 1: Prep and Cleanse Your Canvas
Before any grooming begins, ensure your face is clean and dry. Residual makeup, oil, or skincare products can make hairs slippery and harder to grip, or even lead to irritation.
- Cleanse: Wash your face with a gentle cleanser to remove all makeup, dirt, and oils.
- Dry: Pat your face completely dry with a clean towel.
- Optional: Exfoliate (Gently!): If you have flaky skin around your brows, a very gentle exfoliation can help, but be extremely careful not to over-exfoliate, as this can cause sensitivity. This is less about brow growth and more about ensuring a smooth canvas.
- Brush Through: Use your clean spoolie brush to brush all your brow hairs upwards and outwards, following their natural growth pattern. This helps you see the true shape and identify any stray hairs.
Pro Tip: Consider doing your brows after a warm shower. The steam helps to open pores, making hair removal less painful. However, ensure your skin is completely dry before you start tweezing.
Step 2: Map Your Brows for Precision
This is the most critical step for achieving a balanced and flattering shape. Don’t skip it! Using a thin makeup brush or brow pencil, follow the three golden points:
- Find the Start: Hold your brush vertically against the side of your nose, aligning it with the inner corner of your eye. Mark this point with a brow pencil. Any hairs between this mark and the bridge of your nose are outside your ideal brow line.
- Locate the Arch: Look straight ahead. Place the brush diagonally from the outside of your nose, through the center of your iris (the colored part of your eye). Mark this point, which will be the highest part of your arch.
- Determine the End: Angle the brush from the outside of your nose to the outer corner of your eye. Mark where it meets your brow bone. Hairs beyond this mark should be removed. If your brow ends before this mark, you’ll fill it in later.
Once you’ve made these three marks, you can lightly sketch a rough outline of your desired brow shape, connecting the points. This provides a visual guide and helps prevent over-plucking. Remember, you’re working around your natural brow, not trying to create an entirely new one.
Step 3: Trim for Tidy
Longer brow hairs can make your brows look messy or heavy. Trimming them is essential for a clean, polished look.
- Brush Up: Using your spoolie brush, comb all your brow hairs straight upwards.
- Identify Overhang: Any hairs that extend significantly above the top line of your sketched brow or appear much longer than others should be trimmed.
- Snip with Caution: Using your small brow scissors, carefully snip only the very tips of these long hairs that extend past your desired top line. Cut one hair at a time, very slowly and deliberately.
- Brush Down: Repeat the process, combing hairs straight downwards and trimming any that extend below your desired bottom line.
- Brush Back: Finally, brush your brows back into their natural position and assess. It’s always better to trim less and go back for more if needed, rather than over-trimming.
Caution: Never trim across the entire brow in one go. This can create blunt, unnatural lines. Always snip individual hairs or small sections.
Step 4: Pluck with Precision
This is where your trusty tweezers come in. Work slowly and methodically, always stepping back to assess your progress in a regular mirror.
- Stretch Skin: Use your free hand to gently pull the skin taut around the area you’re tweezing. This makes it easier to grip hairs and reduces discomfort.
- Isolate & Pluck: Using your slant-tip tweezers, grab one hair at a time as close to the root as possible. Pull firmly and quickly in the direction of hair growth. This minimizes pain and reduces the chance of breakage or ingrown hairs.
- Focus on Strays: Start by removing only the obvious stray hairs that fall outside your mapped outline, especially those between your brows and below the main body of your brow.
- Refine the Shape (Lightly): Once the major strays are gone, you can begin to refine the bottom line of your brow. Pluck hairs one by one, focusing on creating a clean, crisp line without thinning the brow too much. Avoid plucking from the top of your brow unless absolutely necessary for a very specific stray hair, as this can dramatically alter your brow shape.
- Step Back & Assess: After every few hairs, step away from the magnifying mirror and look at your brows in a regular mirror. Compare them to each other and to your overall face. This helps prevent over-plucking and ensures symmetry (or balance, at least!).
- Cool Down: Once you’re finished, a cool compress or a soothing gel (like aloe vera) can help calm any redness or irritation.
Warning: Do not try to create a super thin arch unless that is your natural shape. Over-plucking is the most common mistake and can take months, or even years, to recover from. When in doubt, leave it.
Step 5: Fill and Define Your Brows
Now that your brows are shaped, it’s time to add definition and fill in any sparse areas. The choice of product (pencil, powder, or pomade) depends on your desired look and brow type.
- Brush & Assess: Start by brushing your brows with a spoolie to see their natural state and identify sparse spots.
- Choose Your Product:
- Brow Pencil: Best for precise, hair-like strokes. Use a fine-tipped pencil and draw light, feathery strokes in the direction of your hair growth, focusing on sparse areas. Use very little pressure.
- Brow Powder: Offers a softer, more natural fill. Dip an angled brush into your brow powder and tap off any excess. Apply with short, upward strokes, concentrating on the tail and any gaps. Blend well.
- Brow Pomade: For a more defined and bold look. Use an angled brush, pick up a tiny amount of pomade, and outline the bottom edge of your brow. Then, lightly fill in the rest of the brow with short, hair-like strokes, blending as you go. Start with less product and build up.
- Focus on the Arch and Tail: These areas often need the most definition and can be slightly darker than the inner brow for a natural gradient.
- Light Hand at the Head: The inner part of your brow (the head) should be the softest and lightest. Avoid harsh lines here; instead, use very light, upward strokes, or simply brush through any excess product from the rest of your brow.
- Blend, Blend, Blend: Use your spoolie brush to gently blend the product through your brows. This softens any harsh lines and distributes the color evenly, making it look more natural.
Step 6: Set and Perfect Your Look
The final step ensures your beautifully groomed and filled brows stay in place all day long.
- Apply Brow Gel: Take your clear or tinted brow gel and brush it through your brows in an upward and outward motion. This sets the hairs, adds a subtle sheen, and keeps them from drooping. If using tinted gel, apply it after filling but before any final blending.
- Clean Up Edges (Optional): For an extra crisp look, you can take a small, flat brush with a tiny bit of concealer (one shade lighter than your skin tone) and carefully trace along the bottom edge of your brow. Blend the concealer outwards and downwards with your finger or a sponge to lift and define the brow bone.
- Final Check: Step back and examine your brows in a regular mirror, and even from different angles and lighting. Ensure they are balanced and complement your face. Make any final, minor adjustments.
Congratulations! You’ve successfully navigated the path to perfectly groomed brows at home. With practice, this routine will become second nature, giving you confidence and a polished look every time.
Beyond the Basics: Advanced Techniques & Troubleshooting Common Brow Blunders
Mastering the fundamental steps of at-home brow grooming is a fantastic achievement, but the world of brows offers even more techniques and solutions for specific concerns. As you become more confident, you might want to explore these advanced options or learn how to recover from common missteps. Just as understanding different fabrics enhances your How To Build Capsule Wardrobe 2026, knowing these nuances elevates your brow game.
Advanced Techniques for the Savvy DIYer:
1. Achieving a “Laminated” Look at Home: Brow lamination, a salon treatment that smooths and lifts brow hairs, can be mimicked to some extent with the right products and technique.
- Strong-Hold Brow Gel/Wax: Invest in a brow gel or wax with extra strong hold. Some brands offer specific “brow freeze” or “lamination effect” products.
- Upward Brushing: After filling your brows, apply the gel/wax and aggressively brush your brow hairs straight upwards and slightly outwards with a spoolie.
- Press & Set: Use the back of your spoolie or your finger to gently press the hairs flat against your skin in their new upward position. Hold for a few seconds to help them set. This creates a fuller, more uniform, and lifted appearance.
2. Microblading Alternatives & Enhancements: If you have very sparse brows and aren’t ready for semi-permanent makeup, there are ways to create a similar illusion.
- Hair-Stroke Pens: Some brands offer ultra-fine brow pens with a felt tip or multiple tiny prongs that create incredibly realistic hair-like strokes. These are excellent for filling in very sparse areas with precision.
- Brow Growth Serums: For long-term improvement, consistent use of a quality brow growth serum can stimulate hair follicles and lead to naturally fuller brows over several months. Patience is key here.
Troubleshooting Common Brow Blunders:
1. The Dreaded Over-Pluck: This is perhaps the most common and frustrating brow mistake.
- Put Down the Tweezers: Immediately stop plucking. Your brows need time to grow back.
- Growth Serums & Castor Oil: Apply a brow growth serum daily, or try natural remedies like castor oil, which many swear by for promoting hair growth.
- Fill & Conceal: While waiting for regrowth, use brow pencils, powders, or pomades to fill in the sparse areas. Be strategic with your filling to create the illusion of fullness. You can also use a brow stencil if you’re struggling to create a shape.
- Patience: Brow hair growth cycles can be slow, sometimes taking 6-12 weeks or even longer for significant regrowth. Be patient and resist the urge to pluck new growth.
2. Uneven Brows: It’s common for one brow to be slightly different from the other.
- Focus on Balance, Not Symmetry: As mentioned, brows are sisters, not twins. Don’t try to make them identical, as this often leads to over-plucking.
- Mapping is Key: Re-map your brows carefully before each grooming session to identify discrepancies.
- Fill Strategically: Use your brow products to subtly “build up” the sparser or lower brow to match the fuller or higher one. A clean concealer line underneath can also help lift and define.
3. Brows That Are Too Dark or Harsh:
- Choose the Right Shade: Ensure your brow product is one to two shades lighter than your natural hair color (for dark hair) or one shade darker (for light hair).
- Light Hand: Apply product with a very light hand, especially at the head of the brow. Build up color gradually.
- Blend Thoroughly: Always finish by brushing through with a spoolie to soften harsh lines and distribute color evenly.
- Less is More: If your brows look too intense, try using less product or switching to a brow powder for a softer effect.
4. Ingrown Hairs:
- Exfoliate Gently: Regular, gentle exfoliation around the brow area can help prevent ingrown hairs.
- Warm Compress: For existing ingrowns, apply a warm compress to open the pore.
- Sterile Tweezers: Use a clean, sterilized pointed tweezer to gently free the hair loop. Never dig or pick at your skin, as this can lead to infection or scarring. If it’s deep, leave it alone or consult a dermatologist.
- Pluck in Direction of Growth: Always pull hairs in the direction they grow to minimize breakage and trauma to the follicle.
By understanding these advanced techniques and troubleshooting common issues, you’re not just grooming your brows; you’re becoming a true brow expert. This level of detail and care in your routine reflects a holistic approach to beauty, much like considering the nuanced Body Lotion Vs Body Butter Differences for optimal skin hydration – it’s all about making informed choices for the best results.
Maintaining Your Masterpiece: Longevity and Care
Achieving your perfect brows at home is a triumph, but keeping them flawless requires ongoing maintenance and care. Think of it like curating and maintaining a pristine How To Build Capsule Wardrobe 2026 – it’s an ongoing process of thoughtful attention and upkeep. Consistent care not only preserves your brow shape but also promotes brow health, ensuring they look their best day in and day out.
Establishing a Regular Grooming Schedule:
The frequency of your brow maintenance will depend on your individual hair growth rate.
- Weekly Touch-Ups: For most people, a quick touch-up session once a week is ideal. This involves removing any new stray hairs that have appeared outside your defined shape. Catching them early prevents your brows from looking unruly and makes the grooming process much quicker and less daunting.
- Bi-Weekly Shaping: If your hair growth is slower, you might find that a more thorough shaping session every two weeks is sufficient. During these sessions, you might re-map your brows, do a light trim, and then pluck as needed.
- Listen to Your Brows: Pay attention to when your brows start to look ‘messy’ or ‘undone’. This is your cue for a touch-up. Avoid the temptation to pluck daily, as this can lead to over-plucking and disrupt your natural growth cycle.
Product Storage and Hygiene:
Proper care of your brow tools and products is crucial for hygiene and longevity.
- Clean Your Tweezers and Scissors: After each use, wipe your tweezers and brow scissors with an alcohol wipe or cotton pad soaked in rubbing alcohol. This disinfects them and prevents the spread of bacteria, reducing the risk of skin irritation or infection. Store them in a clean, dry place, ideally
Recommended Resources
Check out Breast Health Tips Every Woman Should Follow on Veralyn Media for a deeper dive.
You might also enjoy Home Decor Ideas On A Budget 2026 from Rock Salt Plum.